There comes a time when your iPhone, no matter the generation, might start running slowly, freezing and even have applications crash on it at times – while sometimes this might just be an issue of corrupt files on it, easily fixable by restoring it to factory settings and re-downloading all of your apps back on your device, most of the times it will be caused by storage space clutter and a full memory.
When dealing with lower storage space units, like 16 GB or 32 GB iPhones, I’m sure you would love to make space for your regular playlist, taking photos or immortalizing specials moments on the go. Here’s a list of 10 things you can do to make sure all of the above will be possible and have your phone run as smoothly as it did when you first got it out of the box.
#1 Restore your iPhone
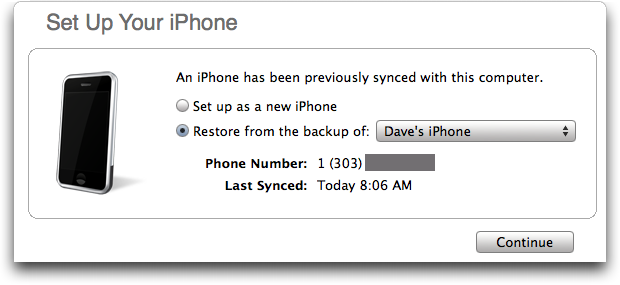
The first and most basic thing you can do to free up space on your iphone, albeit a little time consuming is the good old restore. Depending on the amount of data you have stored on your iPhone, counting apps, photos, videos and contacts, it might take anywhere between 20 minutes and even hours. But for an all purpose clean up, fix up and a solution to pretty much anything that might be wrong with your phone software wise, it would be well worth the time. Restoring your iPhone is, regardless, advisable to do on a regular basis as it makes sure your device stays clean, up to date and with as little stacking over time issues as possible.
The restore to default settings can be easily accessed through either your iTunes or directly from the phone’s menu, although it is not a recommended way of doing things. The reason behind that is the fact that a hard restore from your device’s menu would entail the loss of your data with no available backup. It’s best if this option is left only for the times when your phone ends up in a critical state (hopefully never!).
The way you can do this the regular, safe way is by selecting your iPhone from the iTunes menu and heading to the Summary tab. After that, the first thing that you do is backup your data, either via iCloud or your machine, before heading to manually restoring.
#2 Tinker with iTunes and find more answers

No matter what Apple device you have, when connecting it to iTunes, the program’s interface will give you an ample and easy to understand overview of your space management. On the bottom of your screen under the Summary tab, there’s a color coded bar displaying the total amount of space on your iPhone that fills up depending on what you have on your device – photos, videos, apps, documents and “Other”.
The Other category includes a number of things, such as stored emails, messages, web browsing data (cookies, bookmarks, etc.) – this type of data occasionally bugs out and ends up taking more space than it should. Manually removing it is one way to do it, but restoring your iPhone might still remain the better call.
#3 Check your usage
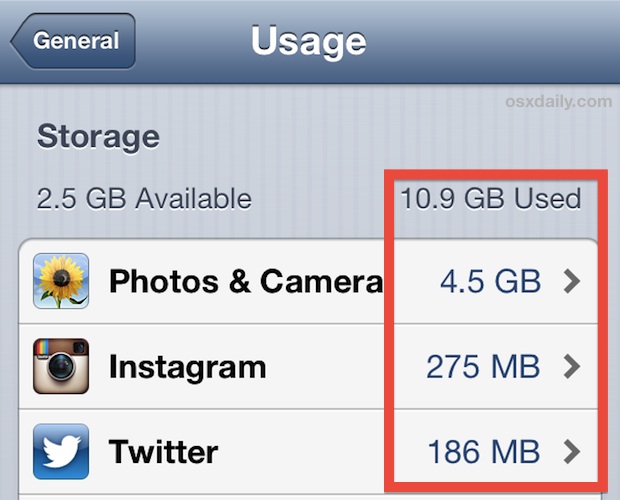
The number three thing you can do to free up space on your iphone is checking usage. If restoring seems like too much of a hassle, the next best thing you can do is finding out exactly what is taking up your phone’s space.
There is a number of surprising things that you can discover as culprits behind a clogged storage. The way you can get this done is accessing your iPhone’s settings menu. To manage your storage, you will be looking at the Usage tab under the General segment of the settings menu.
By tapping Manage Storage, you’ll be taken to a list of apps and how much space they take and the amount of total storage – divided in used and available.
#4 Beware of apps’ internal downloads

While the previous only provides you with insight on which applications are being problematic when trying to free up space, here’s how you delve deeper into the issue. A lot of applications don’t remain at their original download size.
You might be surprised to see some of your apps as being listed as using entire gigabytes of space instead of the few dozen megabytes that their download size was listed as when you got them.
The reason behind that is that a lot of apps enlist a number of internal downloads – Spotify, Podcasts, Cloud and Dropbox services are a few of the apps of this sort.
To fix this, all you have to do is access the particular app that displays unusual storage usage amounts and check whether it’s the downloadable content at fault. After that, it’s your call – you can either opt for deleting the app and finding an alternate way to make up for its lack, or manually delete the unnecessary downloaded content.
#5 Delete unused games

Games are for most of us a pretty fun way of spending past times, whether you’re travelling, stuck in traffic, waiting for someone or whatnot. Given the technology powering up our handheld devices these days, the games that are released come up to par with the hardware capabilities.
With great performance and great graphics however, also comes great space consumption. Even small scale games can take around 50 MB of space, and while that might not seem a lot, when you find yourself with a hefty collection of all sorts of gaming apps gathered from here and there, the space they take suddenly becomes staggering.
If you’re like me, and hold on to many of your games simply because you keep thinking you’ll get back at them and play again sometime in the future when you get bored of the latest fun thing you found, it’s advisable to take a leap of faith and delete some of them when you’re in need of space – considering your scores get saved up to your Game Center account, you can always go back and download them from the AppStore and continue right from where you left off.
#6 Find a better way to store your photos and documents
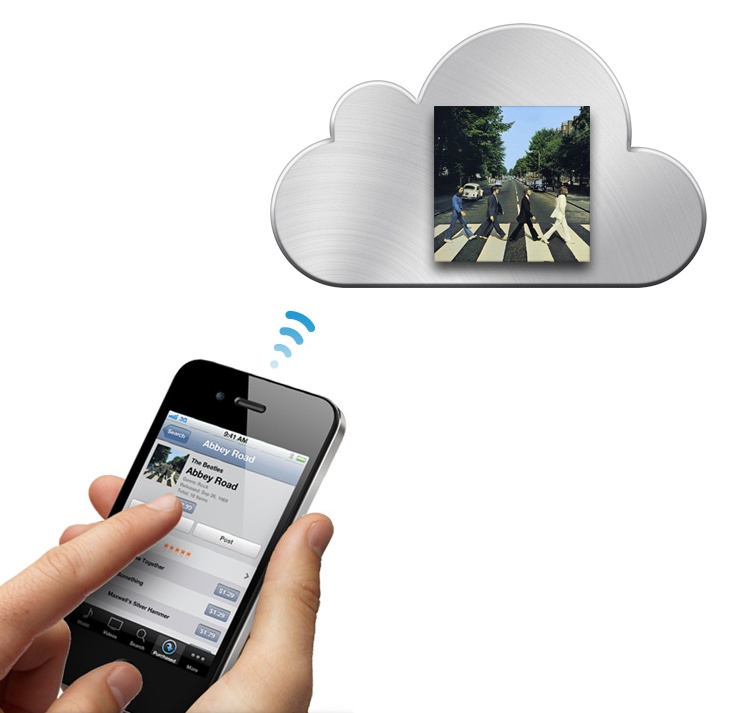
Syncing your data with your desktop/laptop manually is not a bad way to get this done, especially if your machine’s hard disk is large enough for you to not care whether you’ll be using an extra dozen of GB. The smarter choice however, is definitely making use of your iCloud or Dropbox space.
Without spending a cent, you can get up to 7 GB of free Dropbox space, and iCloud offers a basic 5 GB of space with any iPhone you purchase, with the possibility of upgrade. Apple offers 20 GB upgrades for $0.99 a year, 200 GB for $3.99, 500 GB for $9.99 and 1 TB for $19.99. For such a small price you can basically get almost limitless space for any sort of data you want to hold onto.
Google+ is an option as well, considering it provides unlimited amount of storage for photos that do not exceed 2048 x 2048 resolutions and videos that don’t exceed 15 minutes in length.
By keeping your photos, videos and documents constantly uploaded to your cloud, you will surely always be able to revisit them, without having to clog up your mobile phone storage space, and even make sure you never accidentally lose them – in the unfortunate case that you ever have your iPhone lost or stolen.
#7 Get rid of texts that pile up

If you’re the kind of person who texts a lot, it’s not unusual for thousands of messages to end up eating storage space just like anything else. Again, it doesn’t seem a lot since every single text probably doesn’t exceed mere bytes. Multiply that by a thousand and suddenly you’re realizing that hundreds of megs are actually taken by them.
Holding onto texts is nice, but let’s be frank – how many hundreds of messages will you be scrolling up through and how often? Again, manually deleting them – either separately or via the usage feature is one way to do it, but another, automatic and clever method is making use of a setting that many people overlook.
In your Settings menu, under Messages you can opt for your iPhone to regularly and automatically delete out of date texts. You can turn this option on and personalize the frequency of the clean-up by scrolling down to “Message History” and selecting one of the other options instead of “Forever”.
While you only get to choose between 30 days and 1 year, it can still prove to be a helpful hand. Furthermore, you can also customize the life span of audio and video messages received just as well, lower in the same menu.
#8 Sign up for a streaming music service

Unless your music playlist consists of songs that are unavailable on the market, this is probably one of the best space savers out there. Entire, literal gigabytes of space can be freed up if instead of keeping your favorite music saved on your iPhone, you either stream your favorite songs. This is possible through a number of ways, one of the rather popular ones being the music steaming service called Spotify.
It’s just as heavily customizable as your home made iTunes playlist would be – allowing you to make different, separate lists of your favorite songs. Not to mention that it’s a great way to stay up to date with new hits, new album releases and even make new musical discoveries.
Apple also offers its own, personal way of making things better for music lovers, especially those who use iTunes for grabbing their tunes primarily. For a $25 a year subscription, you can get unlimited access to iTunes Match, thus making every track in your iTunes library accessible with just one tap, via iCloud.
The songs that you love the most can be downloaded by tapping the cloud icon next to it in your song list.
#9 Remove old podcasts and videos

While it may seem very obvious to some, here’s something that might not have crossed your mind. Remember all those podcasts that you listened to while doing chores or whatnot? What about the videos and movies you put on your phone to watch for some long flight?
Yeah, go right ahead and delete them. It happens ridiculously often that we forget these things ever existed after we’re done listening to them or watching them. And since you don’t access these parts of your phone as often as you would others, they might be gathering spider webs there on your mobile device for absolutely no reason.
Chances that you will listen to your podcasts again or watch entire movies all over again on your phone out of all things are what – none? Deleting them is easily done by manually accessing your “My Podcasts” at the bottom of Podcasts app main screen.
The application will even make it easier for you, having inbuilt capabilities of sorting through your favorite podcasts and pointing out which you have already listened to by moving them all the way to the bottom of the list. The actual removal is done by a simple swipe to the left and there – you’re done!
#10 Be wary of photo streaming and HDR
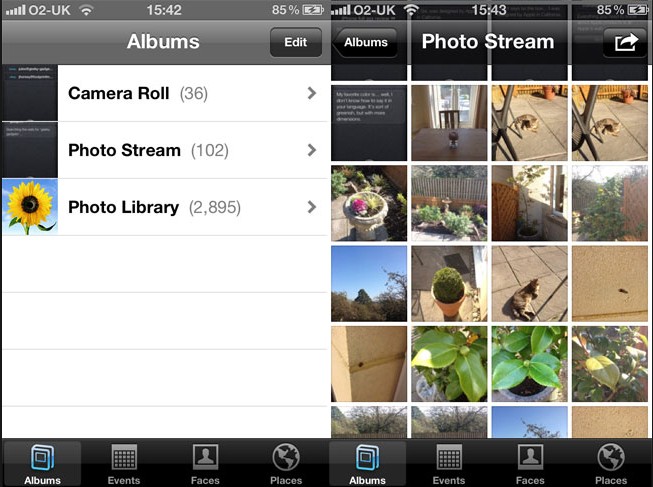
Photo streaming is an option you get when you own more than one Apple device – whether it’s a phone, tablet, iPod, iMac or Macbooks. Sure, having all your photos saved on all of your devices will ensure that you can access them anytime, anywhere you are and be nostalgic to your heart’s content.
But in reality, there’s no reason for you to do physically have them on your phone when you can just quickly access them from your Cloud service of choice. Unless it’s vital for your photos, no matter the number, to be present on all of your Apple devices, you can go right ahead to the Settings menu and turn off “My Photo Stream” from under the “Photos & Camera” submenu.
If you’re using HDR (High Dynamic Range) to take a photo in either low light or for some extra shadow quality, you might be baffled to find out that your phone is constantly saving duplicates of the picture taken – one in HDR, and the original one.
If you consciously choose to shoot using HDR, just go ahead and delete the originals – you can find the option that automatically sorts this out in the Settings Menu – Photo & Camera. The culprit is the option that you can find at the bottom of the submenu – just turn off “Keep Normal Photo” and your phone will cease to save duplicates, one of each kind.
