Argyll Free Press

Growing News Network

Thursday, April 23, 2026
Log in
  • Business
  • Finance
  • Sports
  • Tech & Science
    • HP Envy 4500 Review
    • LG Optimus 170 Review
    • iPod Touch 6th Generation Review
    • HTC One M8 Accessories Set-up
    • Surrealist Games You Must Play
    • Hisense Sero 8 Review
    • Dell Latitude e7440 Review
    • HP Laserjet 1536dnf mfp Review
    • Garmin Fenix 2 Review
    • Skype Vs Viber
    • Best Video Conferencing Software
    • Sony mdr 1r Headphones Review
    • Canon Rebel t3i Review
    • Sennheiser Momentum 2-0 Review
  • Travel
  • Headlines
  • Health
  • United States

Code.org Hour Of Code Minecraft Tutorial

November 16, 2015 By Kenneth Scott Leave a Comment

The Hour Of Code Minecraft Tutorial has been designed by Code.org and Microsoft

Code.org is a relatively new but now popular organization (founded in 2013) whose purpose is to not only motivate people all over the world, especially school children, to learn how to code, but to also help them do so by giving free coding lessons online.

They do this via their eponymous website (www.code.org) where anyone can take free lessons of his or her choice from the offered curriculum.

But another important part of their efforts is the Hour of Code challenge. Which they first held in December 2013, during Computer Science Education week (9th of December to 15th of December) when they launched the concept. The Hour of Code consists of a tutorial that teaches the basics of computer science to anyone who is interested, in under one hour, using a visual programming language called Blockly.

Since its launch in 2013, a new tutorial teaching the same concepts was modeled for each year. In 2014, for example users could learn to make and then customize their own Flappy Bird game.

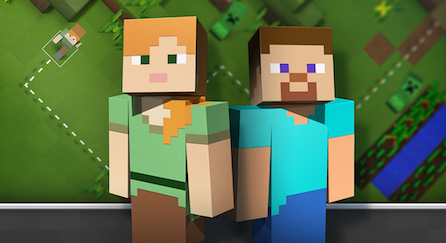
And now, in 2015, the Hour of Code tutorial is Minecraft-oriented. Meaning that potential learners will use Blockly to give instructions to one of two characters of their choice Steve (male) or Alex (female) so that they can perform increasingly difficult tasks over the course of 14 levels in an interface visually similar to the Minecraft environment.

The emphasis behind this being that Minecraft uses the same basic programming and computer science concepts being taught in the Hour of Code, this enticing potential learners because of Minecraft’s huge popularity and appeal, a fact which incidentally has been consistently confirmed by learner’s requests that Code.org kept receiving to make a Minecraft-themed tutorial up to now.

And speaking of enticing learners, Code.org designed the last of the 14 levels in this Hour Of Code Minecraft tutorial to be a free play experience, without a pre-determined set of tasks to do, similar to Minecraft, allowing them to choose from several actions and make their own decisions, in the hope that it would have replay value and they would return to play.

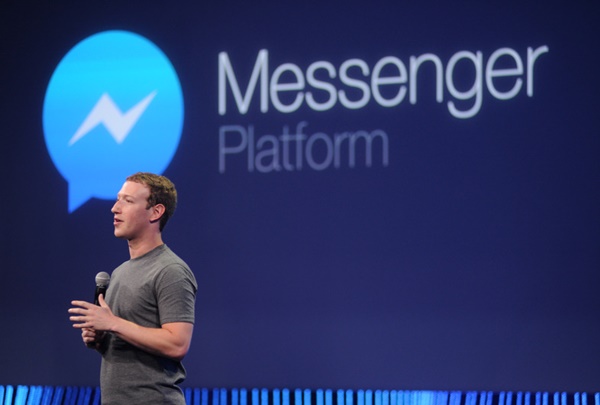
But this would not have been possible without Microsoft (who owns Minecraft, having bought it last year). Because Microsoft, apart from being one of Code.org’s high-profile and generous backers (along with Obama, Mark Zuckerberg and Facebook, Apple and others), with more than 3 million $ donated to Code.org so far, gave the company the right to use the Minecraft name without charge. And also pitched in with a few developers of its own to write this new tutorial.

It also says it was more than happy to help make this tutorial a reality because they had the intention of somehow using Minecraft for education since January and this is a perfect opportunity.

Image source: 1.

Filed Under: Headlines Tagged With: Code.org, Hour of Code, Hour of Code Minecraft Tutorial, microsoft, Minecraft, Minecraft tutorial

Canon Rebel T3i Review – Photography 101 DSLR

November 16, 2015 By Nancy Young Leave a Comment

Canon Rebel T3i Overview

One of the largest names in the digital SLR camera market, Canon, returns with another iteration of their best entry-level cameras: the Canon Rebel T3i, also commonly known as EOS Rebel T3i / 600 D. It comes as a follow-up to the EOS Rebel T2i / 550 D iteration of the beginner-friendly camera that had come out a little more than just a year before.

Affordable and with an extensive list of improvements and features meant to serve as an accessible gateway into professional photography and videography, the Canon Rebel EOS T3i is very much resembling the Canon EOS 60D bigger brother. However, it comes at a much lower price than its counterpart and is directed at a different consumer segment – classifying as an entry-level camera, as opposed to the mid-range category that the EOS 60D falls into.

However, it’s vital to mention that put right next to its previous generation counterpart – the Canon EOS 550D / Rebel T2i, there’s not much change in terms of hardware and technical specifications. While this may come as a surprise to some, it seems like the reasoning behind that is the fact that it packs some extra attention to detail when it comes to video recording instead. If anything, it feels like the Canon Rebel T3i is more of a transition camera between the T2i and the EOS 60D who aims to ease the way of new photographers into the trade and giving them the chance to learn everything step by step without sacrificing the huge amounts of money that you would otherwise have to spend.

Canon Rebel T3i Design

Canon Rebel T3i Size, Weight & Material

In terms of dimensions, the Canon Rebel T3i is a little larger than its predecessor, the Rebel T2i / 550 D, but pales in comparison to the mid-range EOS 60 D. While the entry-level DSLR features a 133.1 x 99.5 x 79.7 millimeter W/H/D size, larger than the 550 D which is only 128.8 x 97.5 x 75.3, the 60D expands all the way to 144.8 x 104.1 x 78.7. As a result, the weight has changed a small degree as well, as the 600 D gained 58 grams over its predecessor – from 525 grams to 583.

The body of the Canon Rebel T3i / 600D is made of various alloys and materials, but remains along the same lines of the build of its predecessor: polycarbonate covers the stainless steel skeleton of the camera, while fiberglass made up the more delicate portions of the device. The sides of the camera are covered in patterned leather patches to improve the grip dramatically – also slightly distinctive in comparison to the 550D which only featured leather on right hand side. There is also another portion covered in leather on the camera back right on top of the thumb rest that is meant to prevent any accidental button pressing when using the camera – it’s narrower and differently shaped than the one on the Rebel T2i.

The sensor has been bestowed with an anti-static coating on its surface. In order to help with dust reduction, there is a low-pass filter vibration that starts when you turn on the camera which you can interrupt manually, as well as an entire dust-removal program included in the camera. By recreating a realistic mapping of the specks of dust present on the sensor, the program notifies you if there is any remaining dirt that it didn’t manage to remove by itself and allows you to do it yourself manually once you pinpoint the exact location.

Canon Rebel T3i Button & Control Placement

Given that the Rebel T3i has brought an articulated screen as one of the major improvements over the T2i, the layout and positioning of all the buttons and controls on the back of the camera have changed in the slightest bit. Because of the screen handle that digs into the area that previously held two controls, everything has been shrunk a little and moved slightly to the side. The 4 directional controls are clumped closer together around the Set button and the Delete control has changed shape and moved closer towards the screen.

Canon Rebel T3i Front

As a last mention regarding the camera back that has suffered changes, the Menu and DISP buttons that were previously present on the T2i have now turned into Menu and Info; the DISP button has been moved on the top area of the camera and serves as an ON/OFF function for the screen while the Info control provides you the ability to cycle through a number of display options and other types of information.

The top of the camera feels narrower than the 550D despite the dimensions saying otherwise. Because of the way it’s constructed and the addition of the DISP button, it gives the Canon Rebel T3i DSLR a more clumped feel, but a rounder look to the edges when seen from above. There is a noticeable increase in depth on the 600D, making it longer back to front. The mode dial is nearly identical to the 550D model but features smaller indents going all around the wheel, making it easier to turn and use. The set of options present on the mode dial is the same as we’ve seen on the 550D, with the small exception that Creative Auto has been moved and that we get a new icon: A+, also known as Scene Intelligent Auto.

Canon Rebel T3i Top View

Canon Rebel T3i Viewfinder, Screen & Other Components

The viewfinder of the Canon Rebel T3i maintains the pentamirror build that we could find in its T2i predecessor, which however has suffered a very small decrease in magnification – from 0.87x to 0.85 – which is hardly noticeable in realistic terms. The viewfinder is good and does its job well, while it may lack a little in comparison to the more expensive pentaprism viewfinders. In terms of the information that it displays, things have remained identical to the EOS 550D. To give you the complete list: AF information, shutter speed, aperture value, ISO speed, AE lock, expore level, spot metering circle, exposure warnings, AEB, flash status, high-speed sync, FE lock and exposure, red-eye reduction light, white balance correction, SD card information, maximum burst and highlight tone priority.

The articulated screen is one of the main focuses of the Canon Rebel T3i. One of the features that Canon started using again only a few years ago, it is particularly useful for a number of situations. With a 3:2 aspect ratio and a 1040k dot display, the screen can be swiveled and tilted at pretty outstanding angles that will allow you to use the camera from more unorthodox positions and even when situated on a tripod.

Canon Rebel T3i Side

Taking a tour around the other parts of the camera, we can find the Canon Rebel T3i battery door at the base of the camera that encloses in it a LP-E8 battery pack. Moving upwards on the right hand side you find a memory card slot that is compatible with SD, SDH and SDXC memory cards. On the opposite side there are two ports hidden behind a rubber flap – one is a regular 3.5 mm headphone jack while the other is a custom RS-60E3 port destined for wired remote control. A little further to the right on this side and you can find the A/V OUT USB and AV combined socket and a mini-HDMI under another rubber flap.

Canon Rebel T3i Features

Hardware. In terms of hardware the EOS 600D hasn’t changed a lot since its previous iteration, the 550D. The Canon Rebel T3i maintains the same DIGIC 4 image processor that we’ve seen in its predecessor, which allows capturing 14-bit RAW imaged. There are no changes to the sensor to speak of; the same 18 MP APS-C CMOS sensor has been used in the Canon Rebel T3i, which comes with a sensitivity range of ISO 100-6400. As a side note for those interested, the range is expandable to 12,800. That makes up for a maximum image resolution of 5,184 x 3,456, at a pixel pitch of 4.3 micrometers. The Canon Rebel T3i can shoot up to 3.6 frames per second in L/F JPEG or RAW formats, the count lowering to 3.3 frames per second when shooting RAW+L/F JEPG.

Canon Rebel T3i Menu

Autofocus. The 11-point CMOS sensor that the Canon Rebel T3i packs doesn’t come close to the AF levels of professional cameras. It has a working range of -0.5 to 18 EV at low ISO and can predict movement in order to increase the speed of the autofocus for distances of up to 8m. There is only one cross-type focus point at the center, and given the small number of points overall, this camera will be more proficient in shooting still images than very dynamic video capture such as filming sports. The longest focus duration that the sensor takes is 3 to 4 seconds when the camera is in Live Mode.

Canon Rebel T3i Sample

CA & A+. Something that we have mentioned earlier in the design section is a modification that we’ve noticed on the mode dial that now displays an A+ icon. This is something that replaces the old Green Zone Auto icon; you will find here information regarding Autofocus, Auto White balance, the Auto Lighting Optimizer and Picture Style Auto.

Canon Rebel T3i Dial

The CA interface is similar to its design on the previous Canon Rebel version, being the place where you can control a number of settings for your shooting session. You can adjust the exposure, type of flash, resolution, drive mode and picture style in this section. There is a certain degree that suggests why this camera is directed at entry-level photography: the menu is made easily accessible and more intuitive for the new user by switching the names of various concepts into simpler ones – aperture becomes exposure level that you can set from brighter to darker, and things such as shutter speed are translated into how blurry you wish for your background to be.

Canon Rebel T3i System

Image processing. There is a number of features that we can add under this rather generic feature – some of which we have mentioned in the previous point. While most are also supported by the Canon Rebel T2i, there are two new additions to the 600D: creative filters and Basic+.

There are various post-editing you can do to the photos you take with this camera. Highlight tone priority is a feature that has increasing the effective dynamic range of the camera as its purpose. This is done by providing extra protection in highlights and maintaining a more level amount of exposure.

Canon Rebel T3i Image Processing

The Auto Lighting Optimizer is something that will prove to be particularly useful, especially when shooting still images that contained shadowed areas. What it does is simply bring out details and increase the contrast in shadowed areas that were caught in the picture, making those portions look less dark post-processing. The CanonRebel T3i Auto Lighting Optimizer comes in 4 levels.

Peripheral Illumination Correction is a feature that automatically applies corrections for each lens you use for the camera according to a recorded database in order to remove vignetting – a darkening effect produced by some lens towards the corners of the image due to the way the lens are constructed. You can manually disable or enable various profiles if the camera does not detect the correct one automatically.

Creative filters are one of the new features you’ll find in addition to the classic 550D ones and native to the more advanced Canon 60D. To list a few of the filters that you would be able to use on the Canon Rebel T3i: Soft Focus, Toy Camera, Miniature Effect, Fisheye mode, Grainy Black & White and more. The fisheye mode for example is a filter that tries to replace the distortion created by a fisheye lens and translate it into a digitally-rendered effect.

Canon Rebel T3i Image Settings

Custom functions. One feature that is really worth mentioning in this section is the ISO expansion which you can do via the custom function – which will pump up the maximum ISO to a value of 12,800. It’s also good to know that the Canon Rebel T3i also offers a much wider exposure compensation range in comparison to other comparable cameras: +/- 5.0 EV.

Multi-aspect. Also a feature incorporated into the Canon Rebel T3i that most aspiring photographers will appreciate is multi-aspect – basically the ability to shoot in a wide variety of aspect ratios. Because it removes a lot of the effort of having to work with post-processing and cropping, many beginners and even professionals will approve of being able to shoot in 3:2, 4:3, 16:9, and even 1:1, highlighting the image format clearly as soon as you start shooting. On the Rebel T3i camera, it’s known as Multi Aspect Mode.

Flash. The flash packed in the Rebel 600D is an auto pop-up E-TTL II auto flash, not very different in quality next to what we have seen so far in DSLRs. While it features a guide number of 13 meters at ISO 100 and an X-sync of 1/200 second, it lacks a number of possibilities that a professional camera would not forget in its construction. The Canon EOS Rebel T3i DSLR flash is capable of functioning as a wireless flash controller; this is something some of you may have already seen on more advanced Canon DSLRs. Also known as Integrated Speedlite Transmitter, it is a relatively new feature that allows you to control a maximum of two groups of flashes – not as proficient as the 3 groups we find on the more advanced cameras – which you can select from a total of 4 channels and a radio spread of 8:1 to 1:8.

Physically-wise, the flash of the Rebel 600D is placed higher in order to not create as little shadowing as possible with larger classes of lenses. Additionally, the hot shoe that older users will have already been accustomed to on Canon DSLRs is present here as well and compatible with a number of flash units.

Movie recording. Thankfully, the Canon Rebel T3i is capable of recording movies as well – and while not much has really changed as the Rebel camera family progressed, there are some thing worth mentioning about this aspect. Firstly, similarly to the point that we’ve discussed about auto-focus to begin with, the process that the camera requires in order to focus on the subjects of what you’re about to shoot takes a considerable amount of time. The camera does considerably worse with moving subjects or heavily dynamic settings, having a hard time at focusing on a subject even after detected.

The Canon Rebel 600D is limited to roughly 30 minutes of video capture or 4 GB size. Depending on whether you choose to shoot in 720p or 1080p, the video may vary more than you expect, as you can shoot approximately 12 minutes in the higher quality setting. While shooting in 720p can be done at 60 frames per second, 30 fps is the limit when shooting in 1080p. Alternatively, the camera has its own protection system that will automatically turn it off if it’s overheating (normally something that occurs during long periods of video shooting).

Audio level control is yet another feature that you can make use of on the Canon 600D – there is a total of 60 volume levels that you manually select through to minimize sound distortion and clipping. There are two stereo channels in charge of audio capture and the audio level of both can be controlled on the spot. In addition, there is also a Wind Filter setting that you can enable or disable for videos that you shoot outdoors when necessary.

Canon Rebel T3i Price & Verdict

There is a great number of things a less experienced photographer will find on the Canon Rebel T3i that can not only ease their way into professional photography but also give individuals a good chance to experience with various aspects of the trade in a user-friendly manner. While it doesn’t come close to its bigger brothers in terms of DSLRs, it does pack a lot of features and capability that you wouldn’t expect in an entry-level device.

As the most iconic downsides however, auto-focus is relatively lackluster in terms of consumer expectations; because of it, video quality has a lot to suffer as well in some situations and shooting photos will imply a considerably longer setup phase.

Canon Rebel T3i Lens

There are a few variations you can get the Canon Rebel 600D in: body-only, it will cost you $799.99, however the price will differ depending on which Canon Rebel T3i lenses you choose. You can purchase the Rebel T3i with the 18-55mm IS II kit lens for $899.99, but the 18-135mm IS kit lens will spike up the price to $1,099.99.

Image Source: 1, 2, 3, 4, 5, 6, 7, 8, 9, 10, 11

Filed Under: Headlines Tagged With: canon eos 600D, canon eos rebel t3i, canon rebel t3i, canon rebel t3i review

Microsoft OneNote adds Video Embeds and iPhone feats

November 14, 2015 By Karen Jackson 2 Comments

Microsoft OneNote adds Video Embeds and iPhone feats

It’s November and this means a massive cycle of updates from Microsoft. Yesterday, as in Thursday, the big M pushed a plethora of new features to its OneNote software across a broad  variety of platforms.

Basically, Microsoft OneNote adds video embeds, new iPhone features and more!

Those who use OneNote Online and OneNote for iOS have the chance to record audio directly into a note from either the web or your usual mobile app. This feature was already available for both the Mac and Windows OneNote app.

However, implementations aren’t similar. If you choose to record or play back audio in a note on an iPhone, or any other iOS-capable product, it blocks everything else on the screen. Meaning, you can use the phone solely for those two actions until you press stop.

OneNote Online is limited to only record audio in 90 seconds portions. This is more than acceptable if you want to record short snippets of somebody’s speech, clearly not sufficient for recording an entire one-hour long lecture.

Unfortunately, neither the OneNote Online or OneNote for iOS are capable of linking notes to positions within the text. It’s a little bit disappointing considering the fact that the Windows and Mac desktop apps can easily do so. Microsoft has noted that it has big plans for iOS – meaning, it wants to improve features and bring new ones. I’m quite hopeful that my iPhone will see improved audio recording, but with no launch date in sight, I’ll just stick to my Android mistress.

Those of us that use the Windows desktop version of OneNote 2016 now have the option to embed videos directly from the web straight into notes – with one simple click of a button called Insert Online Video. Pretty straightforward, right?

The prompted box takes URLs only from Vimeo, YouTube and Office Mix. Sorry, no love for PornHub apparently.

Microsoft is looking to bring this feature to its other platforms – Mac, Android, iOS and its specially designed mobile app for Windows 10. Also, to OneNote Online, which seems to get the short end of the stick every single time.

iPhone 6S and 6S Plus owners have an unique feature designed just for Apple’s OS platform. By using the 3D Touch feature, users can quickly access OneNote’s note creation tools.

By hard pressing down on the OneNote icon, a menu will materialize and users can choose between – recently accessed notes, new photo note and new note.

Microsoft is directly competing with search engine behemoth Google and Evernote. The three are struggling to gain the title of – Best place for ideas and thoughts.

Do you think Microsoft can do it? Or does Google and Evernote have better chances?

Image Source: 1

Filed Under: Headlines Tagged With: microsoft, OneNote for iOs, OneNote Online

Google Play Books Update Pleases Comic Book Fans

November 13, 2015 By Roxanne Briean Leave a Comment

Google Play Books update gets comic book friendly features

There’s a lot of page turning involved when reading physical media. Comic book fans have always gotten the short end of the stick, realizing this, Google set to make things right. The new Google Play Books update is more friendly to comic books and graphic novel fans.

The latest Google Play Books update streamlines the experience of devouring comic books and graphic novels on mobile platforms – read, smartphones and tablets.

Google notes that when someone reads a comic book, or a graphic novel, that individual is becoming deeply involved with the story and art, the pacing and dialogue, in a manner that suits himself. If you tried to read a comic on a small tablet or smartphone screen, you know how nerve wrecking it is.

So that’s why Google is introducing a vertical scrolling experience specially designed for comic book use in landscape mode.

In order for you to take advantage of this new feature, you just need to flip your smartphone or tablet on its side. This will automatically display the graphic novel or comic book in landscape mode.

The new Google Play Books update also makes the store’s library of visual goodies easier to navigate. Now, The Play Store has a dedicated tab called – comics destination; along with a curated list of comic books and graphic novels.

Google is also offering recommendations on what comic books to read next based on what you’ve previously read.

Google notes that their Play store offers a wide variety of comic books from the major players in the industry. This includes – Marvel, Image, Dark Horse, IDW and DC Comics. And boy, aren’t those comic books incredibly binge-worthy.

You can find series like Deadpool, Justice League, The Walking Dead and Mortal Kombat – everything a newcomer and a die-hard fan needs.

Just to make sure everyone understands how much Google respects its comic book and graphic novel fans, the search engine behemoth is offering free comic books from some of the most popular series in the industry – The Walking Dead, My Little Pony, Orphan Black, The X-Files and other awesome comics.

However, for your interest, Google isn’t the only platform for comic book goodies. If you don’t fancy the almighty Google, you can take a look at ComiXology, which offers the same, if not better, streamlined experience for comic books. It also has guided viewing.

To be honest, it seems like Google is using this free comic give-away as a bait to entice new users to use their business, rather than a wholeheartedly thank you for their existing comic book customers.

All of these new changes are set to hit the Play store in the next few days, says Google. They will be available for iOS sometime in the near future. Please note that these changes will be available to comic book fans that reside in Canada, U.S., the UK, Australia, Ireland, India, Singapore, New Zealand and South Africa.

Filed Under: Headlines Tagged With: Comic Books, Google, Google Play Books, Google Play Books Update, Graphic Novel

Snapchat Beware Facebook Temporary Messages Arrival

November 13, 2015 By Deborah Campbell Leave a Comment

Should Snapchat beware Facebook Temporary Messages arrival?

For those unfamiliar with Snapchat (I know, teens everywhere balk at the possibility), it is a social app that lets you communicate by sharing videos, photos and messages with people you decide. So far it sounds like a normal messaging app.

But when you hear impressive statistics like the fact that it was launched in 2011 and is now the 2nd messaging app after Facebook and its biggest competitor, with an increase from 2 billion videos and photos/day sent by its users at the beginning of 2015 (May) to 6 billion/day in November 2015 and that the company is currently worth between 10 to 20 billion $, you have to wonder why all the excitement?

Well, because Snapchat’s core concept is an interesting twist. The app only saves the videos, photos or texts for a short time, after which it deletes them, including from its servers, according to creators Bobby Murphy, Reggie Brown and Evan Spiegel.

This concept is what is currently called temporary messages, ephemeral messages, disappearing messages or temporized messages, depending on who you ask. And users of Snapchat can decide the time limit themselves, which is currently between 1 and 10 seconds.

Murphy, Brown and Spiegel say the philosophy behind this form of communication is to give users the possibility of eliminating the stress of social media data being stored online (like photos which are very appropriate among friends but not so appropriate in formal contexts etc.), to give them the option to have a form of social media where they are in control.

And judging by the stats above, this philosophy was very appealing to many. Including to Mark Zuckerberg, CEO of Facebook, who saw the potential (and threat) and offered to buy Snapchat for 3 billion $ in 2013 at a time when Snapchat was valued somewhere around 2 million $.

Snapchat CEO Spiegel refused, to the shock of everyone watching back then and was since proven right by the company’s soaring value, way past the 3 billion $ offered.

But this has apparently set the stage for a direct battle with Facebook, who clearly feels it has to take measures against its now threatening competitor.

Which Mark Zuckerberg has recently just done. Because he has announced that Facebook is currently testing a disappearing messages option for its Messenger app for all of its users in France, intended to launch in all countries at a later time, but with no exact schedule having been mentioned.

The Facebook version for temporary messages is designed with a minimum 1 hour time-frame in mind (meaning that the messages delete themselves automatically after this time or more, according to choice) and any person in the conversation can opt for this feature.

Facebook, as the number one position holder, has clearly demonstrated its appeal. And with this new feature it might increase it considerably.

But should Snapchat beware Facebook Temporary Messages arrival? Time will tell.

Image source: 1.

Filed Under: Headlines Tagged With: disappearing messages, ephemeral messages, Facebook, Facebook disappearing messages, Facebook ephemeral messages, Facebook temporary messages, Snapchat, temporary messages, temporized messages

Netgear NightHawk X4S D7800 Review

November 13, 2015 By Kenneth Scott 2 Comments

Netgear NightHawk X45

From manufacturer Netgear comes a router that aspires to be much more than the consumer market has seen before in this respect. With the addition of the Netgear NightHawk X45 D7800 router, which contains some impressive hardware and specs in the four-antenna box, we actually have to stop and ask ourselves if this router is not, by any chance, too good for its own good.

The reason behind that is that the technology employed in its construction earns results way better than most consumer computers and devices can actually handle – thus only taking advantage of the router’s power partially. And not in the most impressive percentage either. Because of that, one must ask themselves if the same performance they get with the Netgear NightHawk X45 D7800 couldn’t easily be achieved by means of another, less expensive router.

Depending on the type services your ISP provides as well as the devices you’d be using it on, chances are you’ll have to wait until one or two computer upgrades are done in order for you to enjoy this router’s full, high-speed 5 GHz rates.

Netgear NightHawk X4S D7800 Design

Netgear NightHawk X45 Front

The times when the router was literally the most aesthetically displeasing portion of your desk are long gone. Lately, manufacturers have been paying a little more attention to this aspect as well so you’re not forced to hide away your routers behind extra layers of walls or shelves that would end up taking a toll on the overall performance.

The Netgear NightHawk X4S D7800 is one the best examples in that regard: with a black matte finish, sharp angles and an irregular shape design, the router is made to both look professional and ensure an ergonomic build for its users. The bottom of the router is padded with patches of rubberized material to prevent it from slipping on smooth surfaces and maintaining stability.

The front of the Netgear NightHawk X4S D7800 features 13 LEDs associated with different connectivity features of the router, letting you know which of its functions are currently active – power, Ethernet cables connected and so on. While under normal circumstances they shouldn’t be a problem, in the case that you find them unnerving or distracting, you can turn most of them off using a switch button on the back of the router, thus allowing you to only maintain the power button on at all times and remove the flickering issue.

Netgear NightHawk X45 Antennas

The Netgear NightHawk X4S D7800 router’s power is complimented by the four external antennas. One on each side of the device and two protruding from the back. They can be tilted vertically up to 360 degrees – occasionally limited by construction of course – but not sideways. Considering that the Netgear NightHawk X4S D7800 is a considerably large device – measuring 285 x 185 x 50 mm and a hefty 840 grams in weight, so finding a good location to place it without restricting some of its signal might prove difficult.

There is a number of ports you will be able to find on this model of the Netgear NightHawk. The left hand side feature two USB 3.0 ports that can be used to stream data via external hard disks, memory sticks or other sources of storage that can connect via USB. On the opposite side lies an eSATA port – a hybrid of an external serial ATA and a universal serial bus port – which can be used as an alternative.

Netgear NightHawk X45 Left Side

Netgear NightHawk X45 Right Side

The rear of the Netgear NightHawk X4S D7800 hosts the LED switch that we mentioned earlier, a small reset button that you can only access by using a thing tool to press it, the power socket as well as a dedicated power button to turn the device on or off, the five 10 / 100 / 1000 Ethernet ports – 4 LAN and 1 WAN.

Netgear NightHawk X45 Rear

All of the hardware packed inside is kept cool via the vented sides – all around the sides of the X4S router, there are vents stretching from one edge to another, only leaving whole physical parts where the ports or buttons are located. This is a great addition to not only the design of the router but its performance too, considering it has quite a fair amount of hardware that can, with time, overheat, subjecting the device to a lower performing power and even some damage or wearing out over time.

Netgear NightHawk X4S D7800 Setup & Software

There are two methods of setting up your new Netgear NightHawk X4S. One is, naturally via your browser of choice, the other one – and the overall better variant – via the router’s native software, the Netgear Genie.

Netgear NightHawk X45 Software

If you choose to do it the good old classic way, by entering the IP address into the browser address bar, you are greeted by a “strictly necessary” type of interface that you can do your basic setup in: creating your wireless home network, setting up a name and password, etcetera can all be done from here just as well but otherwise, you’ll be fairly limited.

However, the advisable method of getting everything set up and in place is via its dedicated wizard software. As soon as you connect the X4S to a computer for the first time, you will be prompted to follow through a few, mostly automated steps that will ensure you’ve connected the device correctly, that the router is receiving the signal correctly and possible issues when the setup is unsuccessful. In this phase you will also be offered to install the Netgear Genie – a program that can be installed on both your desktop and laptop – Windows or Mac, as well as your mobile devices. The app can be downloaded for free via App Store, Google Play and Amazon Appstore.

While the Netgear Genie application serves more than just a few Netgear products, with a wide range of functionalities depending on device, for your Netgear NightHawk X4S D7800 router you gain all the control you would ever need over you home network.

On your Home screen you get to see an overview of your router’s current activity – internet connection strength, status of your Wi-Fi signal, a shortcut to your router settings, a representative mapping of your currently network setup (including devices currently connected, intermediary devices or other third party signal boosters), the parental control feature as well as Netgear’s very own ReadySHARE. While most of the features found in the program are pretty much self-explanatory, there are some things that you can do with the Netgear Genie software that is not as transparent.

Netgear NightHawk X45 Network Map

Enabling and using QoS (Quality of Service) for your Netgear NightHawk X4S D7800 router can be done via the genie as well. More specifically, you can set up bandwidth priorities for various services you will use; for example, you can prioritize video streaming bandwidth usage over content downloading if you want to never lose quality of your gaming stream over other network demands that are made in the same home. While you can manually set up all of your QoS preferences, it is set to prioritize video streaming and gaming by default.

Netgear NightHawk X45 Genie iOS

The Network Genie also offers a highly intuitive troubleshooting system that allows you to verify any potential communication issues you might be having between your router and connected devices, complimented by many types of solutions that the software will provide you in order to deal with more basic issues.

Netgear NightHawk X4S D7800 Technical Specifications

In essence, the reason the Netgear NightHawk X4S D7800 router really exceeds the standards that your average device sets is the fact that it’s a simultaneous dual-band build that uses the 802.11ac Wi-Fi technology. The two bands – a 5 GHz and a 2.4 GHz, promise to offer up to 1,733 and 800 Mbps respectively to a total of 2.53 Gbps maximum speed. Again, this is a maximum value and may differ on different builds and computer or device specs. The numbers translate into download speeds of 216 Mbps and 100 Mbps respectively, summing up a total of 316 megabytes per second at a given moment.

In addition to its AC2600 WiFi Router role, one of the greatest aspects of the Netgear NightHawk X4S D7800 is the fact that it’s capable of being used as a DSL modem too, and it’s compatible with VDSL, VDSL2, ADSL, ADSL2 and ADSL2+. This means that most of the time you may not even need the model kit provided by your ISL, and instead just use the X4S.

Another centric technology that you’ll find in the Netgear NightHawk X4S D7800 is the MU-MIMO – more explicitly Multi-user Multiple-input and Multiple-output. This is responsible with allowing more than one device communicate with the router at the same time, without hindering the single each one receives in turn. It’s also known as space-division multiple access because the technology separates users that transmit at the same time and/or frequency by using their different spatial signatures. From one perspective, using many devices with this router becomes its greatest upside if you lack the hardware to make the best of it. Instead of focusing its entire power into one device, you can instead make use of a great portion of its power on several.

Netgear NightHawk X45 Features

The new IEEE Wi-FI 802.11ac generation came with the Beamforming+ technology that allows the router to send radio signals in the direction of the device that accesses it in order to create a stronger and more reliable wireless communication. This reduces a fair amount of lag and stuttering that may occasionally occur in Wi-Fi signals due to external factors, and also ultimately provides a longer range of action.

While during normal usage you won’t really be even noticing its use or functionality, the Netgear NightHawk X4S D7800 incorporates a dual-core 1.4 GHz processor. In the basic function of routing, you won’t be noticing any difference between this and a lower-performing processor as usually, your internet connection size will be limiting the amount of data you can send and receive a long time before the router’s CPU can do so.

The RAM memory however, is slightly more important as it allows the router to use it to convert data from Ethernet to DSL and hold packets while it performs the conversion – so the 512 MB of RAM memory that the Netgear NightHawk X4S D7800 offers are particularly useful and even more speed-oriented. The RAM is complimented by an additional 128 NB of Flash Memory.

Netgear NightHawk X4S D7800 Features & Performance

There seems to be a considerable focus on network performance when it comes to video and gaming streaming when it comes to the Netgear NightHawk X4S D7800. Considering it has default optimizations to detect and improve the quality of this particular type of activity will considerably be an interesting feat for individuals who use or plan to use streaming services such as Twitch or Hitbox. Thanks to the MU-MIMO technology, you shouldn’t experience any hindrance in stream smoothness even when the network is being solicited somewhere else.

There is a particularly interesting feature that the Netgear NightHawk X4S D7800 offers regarding sharing. By using the USB and eSATA ports on either side of the router, you can send data to the devices connected to it throughout your home in order to stream various types of media directly from the source.

When connected through the ReadySHARE feature of the X4S router, you can use any wireless printers directly from your mobile devices such as mobile phones and tablets. The ReadySHARE Vault – an auxiliary service offered – is a free software that allows you to automatically backup your PC to an USB hard drive that you connect to the router.

In terms of performance, any numbers you might be getting will depend on both the internet speed your ISP provides as well as the Wi-Fi – or alternatively Ethernet cards – your hardware contains. Using 3 different types of laptops and devices may, in turn, earn you 3 different sets of results. With that note out of the way, let’s move onto some basic tests that have been run on the Netgear NightHawk X4S D7800.

The numbers that we got on the 5 GHz band as opposed to the 2.4 GHz counterpart differed a great amount. Disregarding the usual decrease in speed and performance that all routers experience as you’re nearing the end of their maximum range, the download speed was approximately 5 times lower at close range and about 8 times lower at long range.

Running some speed tests when situated right next to the router by using the 5 GHz band kept a stable 70 to 80 Mbps speed on the test K55 gen Asus laptop. Moving a couple of rooms away and the signal wasn’t exceeding an average of 55 Mbps. Given the rather modest specs of the laptop used and the maximum 216 Mbps speed that the Netgear NightHawk X4S D7800 is capable of on paper, that is a considerably good result. Towards the very far end of the apartment where the signal was becoming intermittent, we still got peaks of 10 Mbps.

The 2.4 GHz band connectivity doesn’t stand out in comparison to a great number of routers on the market – and more specifically models that are part of a much lower price category. At a 15 Mbps speed at close range and an unflattering 4-5 MBps average at long range, devices that are not compatible with the 5 GHz bands will not benefit greatly from the huge potential of this outstanding router.

Regardless, when and if possible, using the internet by connecting your device directly through LAN port cables will usually provide much better results in a great number of devices. There is also the USB networking variant which turned out to be relatively strong and even come close to the speeds that the 5 GHz band test got.

Netgear NightHawk X4S D7800 Verdict

All things considered, the Netgear NightHawk X4S D7800 is a particularly powerful device that is very likely to even exceed the power that your hardware and devices can hold. Depending on the type of activity you undergo in your home, you can either opt for the X4S in favor of its features and optimizations for various types of uses, or sacrifice the extra capabilities and choose a cheaper mid-range router.

Netgear NightHawk X4S D7800 Verdict

The fact that its performance on the 2.4 GHz band at long range are less than satisfactory, you should take into heavy consideration what type of device you would be needing the internet signal on. If your home or location where you wish to use the router is spacious and you don’t have a central point to place the router in, it’s for the best if you look into alternatives.

If your devices are capable of using 5 GHz, the speeds, ranges and possibilities expand exponentially, and the Netgear NightHawk X4S D7800 remains a router that you will most likely be using for a long time, probably improving at the same time as you start upgrading your hardware.

You can purchase the Netgear NightHawk X4S D7800 for $270 from various retailers – both online and in tech equipment stores.

Image Source: 1, 2, 3, 4, 5, 6, 7, 8, 9, 10, 11

Filed Under: Headlines Tagged With: 802.11ac, ac2600 router, netgear nighthawk x4s d7800, netgear router, nighthawk x4s router

Asus MG279Q Review – A Monitor for Gamers

November 12, 2015 By Nancy Young Leave a Comment

Asus MG279Q Front and Back

While for most individuals a monitor is a necessary peripheral device but not one that you’d spend a huge amount of time picking out once you’ve decided on the size of it and its design, things are a bit different for gamers. Professional or otherwise, for gamers the performance of a monitor is nearly as important as the power of your graphics processing unit and processor. The Asus MG279Q is a great example to begin with – one that can truly compliment your gameplay.

As a matter of fact there is so much more at stake when it comes to video games than just the diagonal of your screen or how pretty the colors are. One of the latest but most important aspects of your monitor that can really dictate the difference between a normal graphic rendering of your games and one that can actually allow you to step up your game is the refresh rate. I’m saying it’s new because the LCD monitor technology has been stuck at 60 Hz since its inception until only 2 years ago. The Asus MG279Q monitor is not the first to employ this new technology, but it packs up a lot of quality and backing aspects that will attend to your gaming and graphic-intensive needs.

Asus MG279Q Overview

The importance of 144 Hz

So the same technology that your television set has that makes movies look eerily natural in motion translates into a lifesaving aspect when it comes to gaming. If you do not already know, the purpose of higher refresh rates is to provide fluidity with which the data that translates into the image you see on your computer. Most of the computer and video games you play will not feel the brunt of the 60 Hz refresh rate because they are limited to 60 frames per second. However, various e-sports or other online shooter games where precision is one of the most important factor, having a low refresh rate will cap the amount of frames, giving you a certain degree of accuracy loss.

Still, the monitor you get is not solely responsible for the fluidity of your games – a hardware to match is necessary to make the best of it. The Asus MG279Q is not the kind of investment you make for an average gear setup because you won’t get that much out of it. So unless you’re planning on upgrading to meet the requirements before, you should consider it thoroughly before.

Made by the Gamers, For the Gamers

Your Asus MG279Q doesn’t stop at just that however. Considering it’s dedicated at a very specific market of gaming monitors, it has a number of features that are destined for that kind of activity. Firstly, it aims to improve the quality of your gaming sessions by allowing you to switch between personalized screen modes depending on the type of game you are playing.

Secondly, the MG279Q is also one of the proud hosts of the AMD FreeSync technology – meant to improve the smoothness of your gameplay by reducing image tearing and frame losses by easening the communication between the GPU and the monitor itself.

A Size to Behold and a Price to Match

The Asus MG279Q monitor is a variant of the 27 inch diagonal monitors – a considerable feat when it comes to gaming. While some may find the extra eye movement that you need to invest in such a large display tiring over long periods of time, everything showed on this monitor is extremely clear, to the smallest detail.

Asus MG279Q All Side View

When 27” monitors first came out, most of the feedback they received was filled with disappointment at the image clarity – because they lacked the resolutions and pixel density to produce clear images with no visible pixellation. Asus MG279Q does not fall in that category – being one of the latest generations of 144 Hz monitors, it employs 1440p resolutions, thus filling up all of the extra space with a keen knack for detail.

The pricing of the Asus MG279Q, however, is not forgiving. If you want to enjoy your gaming hobbies to the full with this monitor, you will have to whip out no less than $599. That’s considerably more than the $350 average price you would pay for a 24 inch 120 Hz variant.

Asus MG279Q Setup & Design

If taken right out of the package, there’s a bit of setting up that must be done before you can actually put the Asus MG279Q to use. The packaging should contain 3 main components – the base, the panel and the upright that connects the two. Thankfully, the setup is one of the easiest possible and doesn’t even require any kind of tools such as screwdrivers. Not many other monitors actually offer this innovative kind of setting up, removing a lot of the trouble that comes associated with it, especially when you order it online for example.

Asus MG279Q Upright

The panel can be snapped onto the upright and adjusted afterwards by making use of the slider switch – for a total of 150 mm of height adjustment. Additionally, the panel can be spun around into portrait mode, as well as tilted left and right or well as inwards or upwards. That is a lot of functionality added into just one simple design idea that will ensure that you don’t risk accidental damage to the monitor when trying to move it further away on your desk or tilt it sideways without having the base move as well. Everything is done with ease, in fluid motions with no need to force the components to move in the direction you want them to.

Asus MG279Q Screen Tilt

The entire design of the monitor is based on straight lines, giving it a highly professional and top end-look. The bezel of the Asus MG279Q is particularly thin, giving you the opportunity to implement it into multi-monitor setups. On the bottom right hand side rest the setting and control buttons on the rear of the monitor, described by the icons displaying along to each button separately on the front side. There is also a mobile button that you can use to make navigation through the menu easier as if you were using a mouse to move diagonally across the feature.

The back of the MG279Q is where you can find the vents that are responsible for keeping the monitor cool. They’re part of a secondary construction placed and connected to the main body of the panel, giving it a lot of room for the cooling process to be truly effective. The box also features the power and other ports that ensure the MG279Q’s connectivity. On this note, there is an IEC power chord port separated from the rest of the slots, a mini DisplayPort as well as a normal DisplayPort output, 2 HDMI ports and 2 USB ports. The two USB 3 ports that the monitor presents are also placed on the back, making them a little more difficult to reach if only used occasionally. However, the monitor’s OSD allows you to keep the USB slots powered even when the Asus MG279Q is turned off or in stand-by, so you can easily just use them as a power source for other devices.


Asus MG279Q Ports

Asus MG279Q DisplayPort and Mini DisplayPort

The entire Asus MG279Q has a uniform matte finish on its entire body. The base is made stable by the material used underneath, which was specifically design to spare your desk of any marks that could be left by the monitor.

The entire construction weighs 7.3 kilograms, at an overall physical dimension of 625 x 559 x 238 mm.

Asus MG279Q Specs

To list what this monitor is capable of on paper is not really merely enough. Once again, no matter how impressive the specs and capabilities of a monitor are, some would need backing up through hardware – mostly reliant on the graphics processing unit (GPU).

The Asus MG279Q is a 1440p monitor meaning that its maximum resolution has been pushed up to 2560 x 1440, making for the more classic 16:9 aspect ratio that most games employ nowadays without the need of letterboxing.

The monitor is an IPS W-LED build. The IPS panel technology is one of the best currently employed in monitors because they offer an impressive color accuracy and are some of the brightest builds out there. Because of that, IPS panels have an amazing viewing angle – the Asus MG279Q listing 178 degrees on its specification sheet. However, the price of IPS upsides is that blacks are relatively poor – the TN panel alternative offering richer blacks – and that the former is not as fast and responsive as a TN alternative. The response time of the Asus MG279Q is 4ms G2G (gray to gray switch).

Asus MG279Q Viewing Angle

The backlight technology that powers up the IPS panel is W-LED (stands for white light emitting diode). The LED technology allows for thinner displays to be built, in favor or LCD. The overall brightness of the Asus MG279Q is scored at 350 cd/m2. Thankfully, the screen doesn’t lack an antiglare coating, meaning that it should withstand in high luminosity environments – however, most of the time you’ll want to not have a source of light behind you when using it as the quality still suffers a fair amount.

The Asus MG279Q is capable of 1000:1 static contrast ratio and 100 million:1 dynamic contrast ratio. Together with the 144 Hz refresh rate, you will not only get a highly responsive display from an information perspective, but from a color accuracy one too.

Asus MG279Q Features

There is a number of special features that you will find in the Asus MG279Q; namely, the AMD FreeSync technology that has been implemented in some AMD GPUs recently, the game modes feature and its very own OSD calibration.

AMD FreeSync

AMD developed a new type of technology that is meant to fluidize the communication between your monitor and graphics processing unit in order to eliminate image tears and motion choppiness. Its counterpart is nVidia’s G-Sync, but it presents a series of advantages over the latter. Firstly, it doesn’t affect the overall performance of your computer and thanks to its ability to reduce the panel’s refresh rate when the screen is static, it allows to lower power usage. The AMD FreeSync feature is implemented in the Asus MG279Q, but that means that you will require a FreeSync capable GPU to take advantage of it, using the DisplayPort cable that comes with the monitor.

Screen Modes

The purpose of the screen modes that the Asus MG279Q comes with is to ensure different types of adjustments for various video game genres. It’s inconclusive how much of utility is really holds and to what degree you’ll be using this actively. For example the FPS mode boosts brightness and contrasts in order to make it easier to see in dark areas in the game. While that purpose alone is fulfilled, it turns out to be relatively taxing on other aspects of the display such as color temperature. The RPG and RTS mode brings a boost to the color richness, and the vividness of the display overall, making for powerful, contrasting images. There is also a Racing mode that your screen will be using as default that reduces input lag as its first priority.

Asus MG279Q OSD Screen Modes

There are other modes that the screen is capable of that are not gaming-centric: Cinema, Scenery and Eco Mode. The first of the three is supposed to improve your movie-watching experience; the most obvious change to this mode was however an increase of color temperature resulting in increased blue levels. The Scenery mode is there to help with photo viewing and provides some extra color saturation – which may not turn out to be the best thing in some cases. Lastly, the Eco Mode considerably lowers the screen’s brightness, reducing power consumption down to 30W. While that is only an 8W decrease from its default 38, the number is still a very decent value in comparison to most other gaming monitors of this scale.

OSD Calibration

The Asus MG279Q on screen display calibration is very straight-forward and allows you to set up your preferred selection of screen settings directly. The system consists of 7 categories of sub menus: GameVisual, Blue Light Filter, Color, Image, Input Select, System Setup and MyFavorite.

The first of them all is the menu that you select your Screen Modes that we’ve just elaborated on from. The Blue Light Filter is in charge of modifying the image’s warmness by lowering blue levels. The Color sub menu contains all of your controls for brightness, contrast, saturation, color temperature and skin tones. The image sub menu has to do with a lot of tweaks to screen sharpness and edge enhancements.

Asus MG279Q OSD Settings

While Input Select is self-explanatory as being the place where you select which signal you want to display on your screen – via either one of the HDMI ports or the DisplayPort/Mini DisplayPort – the System Setup feels like a sub menu where “everything else” was put in. Key Lock, very basic monitor information, Power Indicator, Power Key Lock, USB Charging as well as a complete setting reset option all reside here.

Asus MG279Q System Setup OSD

Lastly, the MyFavorite sub menu allows you to create 4 different profiles that you can switch from whenever you feel like it: say for example you’ve set up your screen with a certain selection of brightness and contrast levels for a particular game that doesn’t look as good in another. You can save it under one of the profiles and come back to use it again next time you need it without having to redo each setting in particular.

Asus MG279Q Verdict

Overall, the Asus MG279Q monitor is a very solid choice. It offers an amazing image quality, high quality materials and a few features that you may not find in other monitors of the same scale on the market. But on the same level, many other monitors out there offer their own selection of feats and special optimization tweaks which you won’t find on the Asus MG279Q. it’s a fair balance, everything included, and its price – while high – is pretty much on par with the prices of the competitors’. The AMD FreeSync is a great thing to have, but somewhat limits you to what your current hardware is.

Image Source: 1, 2, 3, 4, 5, 6, 7, 8, 9, 10

Filed Under: Headlines Tagged With: 144 hz asus monitor, 144 hz monitor, 27" monitors, Asus MG279Q, Asus MG279Q monitor, asus monitor

Revols 60 Seconds Molding Custom Headphones

November 12, 2015 By Cristopher Hall Leave a Comment

Revols 60 Seconds Molding Custom Headphones are here.

A startup company from Montreal, Canada called Revols are getting a lot of buzz for what appears to be their game-changing innovation for high-quality headphones.

The main problem that the company’s founders Navi Cohen and Daniel Blumer wanted to address was that of the insufficient comfort and (after a few hours of use) downright hindrance caused by the mismatch of unique ear shapes with uniform, standard issue headphones.

Their reasoning, based on obvious biological arguments, was that if a person’s ears are as unique in shape as their eyes, fingerprints or other individual, specific traits, their headphones should be too, in that shape.

They succeeded in creating a prototype now delivered through their very successful Kickstarter campaign, which in hours after launch reached its 100,000 $ goal and surpassed it, numbering 1960 backers and 442,984 $ in funding at the time of this writing.

The major innovation and breakthrough that led to this success revolves around a currently undisclosed proprietary technology developed and soon to be patented by Navi Cohen, thanks to his expertise in plastics and engineering.

In short, when he and Blumer talk about the Revols 60 seconds molding custom headphones they are not making a sensational marketing pitch, but accurately describing what their product really is: a pair of high quality headphones that you put in your ears and in 60 seconds or under adopt their shape and afterwards keep it, permanently.

It works like this: you download an app which will instruct you through the process, put the factory delivered headphones in your ear as indicated, and press a button, after which the app sends the instruction to the gel that exists on the headphones’ buds to start hardening. The whole thing takes approximately a minute, during which you get a warm sensation in the ear to let you know that it’s working.

After that, you have your very own permanent, custom headphones.

Other interesting features and functionalities.

They are wireless headphones that work via Bluetooth.

Though Revols is working on making a charging cable as well, which they are designing to allow you to listen to music while charging, at the moment the headphones work on battery, which lasts for about eight hours. But you also have the option to add another external battery for another 6 extra hours.

Being a tight fit to your ears, they have great passive noise isolation, but also have a built-in microphone that allows you to hear external noise if you want, the level of which you can adjust with the app (Revols’ self-named “adjustable soundscape”).

The audio hardware part will be provided by the Japanese firm Onkyo, renowned for high-end audio quality.

The price for Revols headphones will be 300$ when they start being sold. However, the Kickstarter campaign features a significant discount: 200$ per set if you back them up now.

Image source: 1.

Filed Under: Headlines Tagged With: custom headphones, high-end custom headphones, Revols, Revols custom headphones, Revols molded custom headphones, Revols molded headphones

Google About Me Tool Makes Privacy Easy

November 11, 2015 By Nancy Young 2 Comments

Google just launched a new privacy tool called About Me

In their ongoing efforts to make their services better, the mammoth tech company Google have come up with a great and handy new addition to their services.

In case you’re confused as to what services those are, considering that Google is currently being involved in many projects from areas as diverse as robotics, internet infrastructure to genetics, the services in question are the Internet related ones that it offers its users like the search engine that made Google into the hugely successful company it is today, Youtube, Gmail, Maps etc.

And the mentioned addition is the new Google About Me tool which just solved the problem of privacy regarding all the disparate data that Google had collected from users from the various above-mentioned services.

Before this new tool, users couldn’t easily see, in one place, all their collected personal information that was shared to other users across the various services.

But now, the Google About Me tool makes it a reality. You just have to go there and you can not only see everything in one place, but you can edit the date and, most importantly, remove it. With certain limitations.

For example, you cannot remove your photo or your entire name. You can only remove the last name if you desire. But your first name is mandatory. This is probably because Google uses your photo and name to identify you as opposed to other users.

Another no-no is deleting your entire birthday. You can hide the year if you want, but the day and month will remain inaccessible. This probably has to do with Google wanting to monitor the activity of its underage users.

Of course, if you’re not interested in deleting personal information that others see, you can go the opposite way and add information. And Google will give you prompts of what it thinks would be useful like: where you work and where you were educated, contact info etc.

The Google About Me app change came because Google no longer requires users to have a Google+ account in order to access its services (as it did), so since there are now those who do have an account (and could see their visible personal info there) and those who do not, yet personal information is collected from both, it was necessary to find an efficient, fair solution.

Which they did through this neat tool.

Another feature of the tool currently in development is to let you see how other users see you across Google’s services with a preview option in the About Me app, called “View as public”.

Overall a welcome change and another step towards efficiency and simplification.

Image source: 1.

Filed Under: Headlines Tagged With: Google, Google About Me, Google tool, New Google About Me tool, new Google tool, new Google tool About Me

BlackBerry Priv Review: A Guide to Being Different

November 11, 2015 By Karen Jackson 7 Comments

BlackBerry Priv Overview

When it comes to the world of smartphones, BlackBerry is one of the names that most of us have forgotten. Even if once we called ourselves devotes BlackBerry fans when the phones made by the company filled a niche segment of the market none other did, most individuals have since moved on from the QWERTY phone to other things. Now, after countless of attempts to return in the business with something at least comparable to what people normally aim for, but without giving up its trademark features, BlackBerry Priv might have finally just nailed it.

It really feels like BlackBerry really managed to make something that is more than just a bunch of forced features into a desperate attempt to breach into the market. The Priv is a pretty impressive mixture of things that may appeal to more than just a few people. To list a few, the BlackBerry Priv is a 3 in 1 kind of smartphone: it includes a slide up model that hides a QWERTY keyboard below it, without sacrificing the existence of a touchscreen. On top of that, it is the first of its kind to feature an Android operating system, a satisfying and refreshing thing in a long line of BlackBerry OS featuring phones.

There’s a lot of things worth praising about the BlackBerry Priv. The class of users it targets however is not your regular state of the art smart phone user; in that extent, the Priv is not able to hold its own ground that well. However, for a former BlackBerry user that was disappointed by the falling behind of that type of phone and finding themselves forced into giving up the keyboard in favor or other phones, Priv is back – new and highly improved.

Ultimately, the BlackBerry Priv is a phone targeted at a more limited sector of the market. On one hand you get the BlackBerry fans who finally have a smartphone that caught up with today’s standards and delivers a full keyboard experience as well as a highly responsive touchscreen. On the other hand, the BlackBerry Priv remains a phone that maintains privacy and security as their main focus, aiming at the business, corporate and work phone market.

BlackBerry Priv Design

Where to start? It’s an overstatement to go ahead and say that the BlackBerry Priv revolutionizes the design of smartphones worldwide. It doesn’t, as a matter of fact all it does is implement older trends of building phones into a refreshing and sleek style. Taking a first glance at it may actually only elicit some disappointment from the Android and Apple-savvy, as it looks rather bulky and rugged if you compare it to the iPhone 6 or the smooth and curvy edges of the Samsung Galaxy S6. The build is quickly explained however, as you slide up the seemingly immobile touchscreen part to reveal the good old BlackBerry keyboard – also modified since its last few iterations.

BlackBerry Priv Extension

BlackBerry Priv Angles

The BlackBerry Priv features a beautifully designed display with curved edges – very reminiscent of the Samsung Galaxy Note 4 Edge construction – one of the first devices that featured the curved edge screen technology. However, in Priv’s case, the curved edge does not serve any other purpose than aesthetic: there is no functionality attached to that side of the screen like we found in the Galaxy Note 4 Edge, except the small mention that there is a battery indicator that pops up when charging the phone and a productivity app. However, the entire build of the phone feels really well thought out. All the pieces that make up the Priv are neatly tugged together and give the phone a very solid feel.

For its overall size – more specifically 147 mm in height and 77.2 mm in width, the BlackBerry Priv is not your thinnest smartphone in the shed. At 9.4 mm thickness, most of that extra bulk is caused by the unmistakable presence of the capacitive 4-row touch keyboard. The weight suffers a fair amount too – at 192 grams, it’s averaging 10 to 15% more than you can normally find in the latest phablets that also use aluminum in their construction. When you slide up the screen in order to type, the weight switches a fair amount onto the top half while you attempt to use the keyboard on the lower half – this may make the phone feel a little strange to hold, especially as you move your thumb around for various keys. Additionally, the height of the phone goes up to 184 mm – a little strange the first time you see it, but easy to get accustomed to.

It’s vital that we dissect the fate of the new BlackBerry keyboard a little. While it may look like it, it’s very much different from the ones we have seen in older BlackBerry phones. The capacitive keyboard that first made an attempt at breaking through with the rather odd release that was the BlackBerry Passport specializes in more than just serving as your typical QWERTY. You can, as a matter of fact, use it as a touchpad as well, easing the navigation and giving you another way of using the cursor – a downright blessing considering clunky features such as having to tap right inside the word you’re trying to edit on a regular smartphone; I’m sure I speak for everyone when I say that just deleting the entire word and rewriting is the less frustrating way of doing it on a touchscreen.

BlackBerry Priv Keyboard

However, it’s to be noted that if you haven’t ever used a phone keyboard before or haven’t used one for a long time, you might have a hard time getting accustomed to it. The keys are very small and very close together, making it relatively difficult to use without ever misclicking. However, it’s a well-known fact that a full keyboard makes typing much easier overall and incomparable next to touchscreen typing: nothing can replace physical feedback to your button presses. Use it in full-touchscreen mode only, and you’ve got a comfortable 5.4” display phone, pleasant to hold even if the edges are thicker than you’d want for it to be perfect to hold.

The woven carbon fiber back reminds us of BlackBerry classic models right away: as usual, the BlackBerry logo adorns the beautiful design of the back cover, along with the camera sensor peeking out with its dual led flashes right to the side. While the material used on the back helps with the grip of the phone in an elegant and sleep manner, the fact that the sensor is physically sticking out may be perceived aesthetically displeasing for some. Its edge is metallic and engraved with the brand name and may be subjected to scratches and some damage over time.

BlackBerry Priv Back

BlackBerry Priv Side View

The button placement all around the phone feels very tidy. On the left hand side you can find a single power button; the right hand side features 3 different buttons: the topmost and bottom buttons control the volume, while the one placed in the middle is a mute button. The bottom edge of the phone is home to the Type C USB charging port as well as your regular 3.5 mm headphone jack and the top of the phone – peculiar placing truth be told – is where you’ll find the microSD slot and the nano-SIM tray. The speakers of the phone are neatly placed on the bottom of the front face – right below the display when it’s covering the keyboard.

BlackBerry Priv Speakers

There’s a distinct complaint that many users have made to the physical functionalities of the BlackBerry Priv; one of the most commonly heard ones is the lack of a fingerprint reader – something that most newest smartphones employ as a method to secure both your data and your privacy. BlackBerry developers however do not consider fingerprint detection as the best way to keep your smartphone protected and instead choose to focus on other aspects of security – data encryption and a different unlocking algorhythm that implies a picture password – you have to drag the number of your choice on a randomized grid. The grid changes with every unlocking of the phone so movement recognition or fingerprints and smudges on the screen won’t do if someone tries to access your data.

BlackBerry Priv Display

By all means, the screen that the BlackBerry Priv employs is simply amazing; at least judging by previous standards set by the company. At a size of 5.4 inches, the AMOLED capacitive touchscreen is covered by a layer of Corning Gorilla Glass 4 – protecting it from smudges and scratches. As previously noted, the curved edge screen technology is employed in the Priv as well but here it mostly serves a design purpose, giving the phone a splendid look if not for anything else.

The display makes an effort at allowing you a great amount of interactivity with the software by making use of a multi touch feature: up to 10 fingers can be used to make up for a variety of commands that make your navigation smooth and work possible straight off your smartphone.

BlackBerry Priv Screen

Given the 2560 x 1440 resolution that the display presents, it makes up for 540 ppi pixel density: that is not only amazingly high, but actually comes in close or even exceeds the numbers we’ve seen in high-end devices out there. To only list a few, think of the flagship phablets such as Apple iPhone 6S Plus (401 ppi), Samsung Galaxy S6 Edge (577 ppi), OnePlus 2 (401 ppi), Samsung Galaxy Note 5 (518 ppi). Such a high score in resolution and pixels per inch mean that your phone will not be limited to work alone, even if it’s meant as an aid in that direction. Working on it will feel precise and clear, especially when dealing with blocks of text, and you’ll easily be able to make use of it for more casual use in your past times just as well.

The designers have remained loyal to the AMOLED build – not as proficient as the newer LCD screens employed in some devices but still a contender when it comes to high-quality imagery. The colors are vibrant and vivid, standing out thanks to the true blacks native to AMOLED displays and do not tax the battery life as much. However, there is some degree of realism lost when looking at the hues of colors – while they do not lack in richness, they will take a few steps away from real colors; you can mostly notice this when viewing photos you’ve taken of outdoor sceneries for example. Brightness levels are decently high, but lose some ground in face of some, if not most flagship devices.

BlackBerry Priv Specs & Performance

Given that the BlackBerry Priv is pretty much meant for work use, it’s got a lot of powerful hardware to speak of, making it suitable for various types of activities – both work related and leisure. The specs it features are not the latest or newest on the market, but can still pack the metaphorical punch. The Priv features a hexa-core Qualcomm MSM8992 Snapdragon 808 processor, 3 GB of RAM memory and a dedicated Adreno 418 GPU. To wrap the package up, BlackBerry has also put a default 32 GB of storage space in there too – extendable by up to 200 GB via the microSD slot.

The Snapdragon 808 processor chip is now nearly a year and a half old but only succeeded by the 810 version. The CPU is made up of two separate processors – a dual core 1.8 GHz Cortex-A57 and a quad-core 1.44 GHz Cortex-A53. If work is your only concern, then this power pack is nearly an overkill – being more than enough for any document and report editing or e-mail related necessities. Nevertheless, the processor responds relatively well to tasks of other nature as well: you can easily use it for any of your entertainment needs such as enjoying various types of media.

Along with the processor, the 3 GB of RAM memory compliments your activity by adding considerable amounts of multitasking capability and a high performing device even when put under stress with heavier applications. 3 GB makes up for an on par piece of hardware with most of the other top end smartphones on the market. Only a very small number of flagship devices feature 4 GB memory cards at this date.

While this is an aspect that not many individuals will be interested in if they plan on using the BlackBerry Priv for work alone, the presence of a dedicated graphics processing unit is a great addition when you want to use any graphic-heavy applications. If your work does not involve them, you will still get a great smartphone that you can enjoy when off duty too – anything like smartphone 3D games, watching movies in HD and whatnot will be possible with the Priv. Regardless, it will show signs of difficulty when attempting to run particularly new apps such as late 2015 or future productions.

The phone doesn’t come in more than one variant – you can only get it with a base 32 GB of storage space. While that should suffice for your needs in theory, any additional need of space can be satisfied by making use of a microSD card as large as 200 GB.

In terms of performance, the BlackBerry Priv seems to be doing worse on paper than it feels like in reality for some reason. Considering that the benchmarking scores placed it a long way away from devices that were comparable in price, the time we’ve spent playing around with it showed close to no hiccup whatsoever. The only time when it felt like the phone was not keeping up and downright slowing down wasn’t any different than the times most phones do: when it was heating up or put up to stress tests.

Heating up is already becoming a relatively normal thing on large display smartphones when it does not exceed normal limits. Considering the hardware packed inside is nearing the power our computers and laptops had several years ago but without the cooling system to go with it, even if the construction is different, your Priv will heat up when you use it for demanding apps or for a very long time. It’s mostly noticeable when playing games, watching videos on YouTube for a long time or using complex apps that make use of features such as GPS. Naturally, using mobile data over Wi-Fi does increase the effect a tiny bit too.

BlackBerry Priv Software & OS

While some former BlackBerry users may frown on it and others will welcome the switch, the Priv has given up on the BlackBerry OS 10 in favor of the Android OS v5.1.1 Lollipop, naturally adapted to include native apps and features of BlackBerry phones. The operating system present on the BlackBerry Priv is not your regular stock Android and instead skinned and built to serve the very purposes the phone was originally intended to aim at.

BlackBerry Priv Android OS

The most distinct change that any Android user will immediately notice is the existence of pop-up widgets; different from the purpose that regular widgets have on your more usual Android phones, the pop-up widgets remove the amount of clutter you would normally end up with on your screen. Instead of stacking up on all the “functionalities” that inherently slow up the performance of your phone overall, the pop-up widgets only come up when requested with a simple swipe over an app icon on the home screen. Instead of having an entire half of your screen covered by the information, you can immediately bring it up from just one small icon.

BlackBerry Priv remains loyal to what it originally intended to deliver to its users: privacy, hence the name of the phone in the first place. The developers have included a series of DTEK privacy controls that makes this particular smartphone a favorite for work and businesses. The DTEK controls give you a way of securing and monitoring your phone by letting you know exactly whether the apps you are using are accessing your location, microphone, any of the data stored on your Priv and so on. You can directly limit the amount of access you wish to give various applications directly from a general dashboard, and whenever the program detects potentially unsafe activity from another software, it will provide you with recommendations on what you can do to limit it. Overall, the DTEK privacy controls will allow you to know exactly what is happening on your phone, when, and how to keep it in check.

BlackBerry Priv Widgets

Google Now makes its presence felt on the BlackBerry Priv too – one of the newest features on the Android systems that basically allow you to get information about anything you are doing at a given moment, as if you were Googling it. And the greatest part of it all is that you will have access to Google Play – so the source of your apps is limitless.

Lastly, for former BlackBerry users: thankfully, the BlackBerry Hub has been implemented on this iteration of the Android OS too. That means that all types of communication services are all gathered in one place, giving you an easy method of keeping track of everything you need to. Emails, texts and various social media service messages can be found in the Hub, and you can filter them according to a series of factors. And the best part of it is that depending on the type of messaging you are attempting to use – e-mails for example – you can get a load of formatting options you may, otherwise, not find unless you were using a program such as Word.

BlackBerry Priv Software

BlackBerry Priv Camera

The rear of the Priv features an 18 megapixel camera – while that may sound impressive on paper, it doesn’t even come close to a professional image capturing device. It’s unquestionably better than anything we’ve ever seen on a BlackBerry before, but barely manages to be up to par with most cameras you can find on high-end devices.

BlackBerry Priv Dual Tone LED Flash

The photos that this camera allows you to take look decent on first look thanks to the dual tone LED flash and the phase detect auto-focus feature; on a closer inspection however, you’ll realize that they lose a great deal of their quality when zoomed up to full resolution. All of the software editing and shooting options are there however, counting touch focus, face detection, HDR and shotting panoramas as only a few of them. The camera fares a little better in terms of video shooting – surprisingly. It allows shooting in 2160p at 30 frames per second and 1080p at 60 frames per second respectively.

The front facing camera is faring marginally worse. The BlackBerry Priv is surely not your best candidate for selfies. It’s more than obvious this aspect was not a focus of the designers when they planned out the phone; and why would it since it is mostly targeted at professional use. The 2 megapixels won’t produce stunning images, but will be a modest “enough” for video conferencing for example. If selfies are really your concern however, one fun and useful feature that the Priv offers you is a selfie panorama mode – allowing you to take wide shots that your entire group will fit in.

BlackBerry Priv Battery & Verdict

One aspect that so many potential users will be extremely pleased to hear about is the 3410 mAh battery that’s packed inside the Priv. It’s an incredibly powerful pack that should make up for the fact that the battery is not removable. The tests we’ve run on the battery life are more than pleasing: with a moderate to high type of usage – that includes a lot of social media app usage, 3 to 4 hours on average of web browsing and even around 30 minutes of watching videos only took the phone down from a full charge to ~25% over a 12 hour span. With a less intensive type of activity on the BlackBerry Priv (that includes document editing for example since it consumes considerably less resources) and taking several calls during the day won’t even take you below 50% battery usage – lasting as long as about 36 hours until the charge is fully depleted.

BlackBerry Priv Charging

And because charging is done using a Type-C USB charger that is now one of the latest and highly performant you can get for a handheld device, charging will normally take a lot less than you’re used to.

Overall, the BlackBerry Priv is certainly not to be trifled with – it offers an incredibly sleek-looking professional smartphone that has not forsaken its roots and principles. For work-related purposes, you can hardly get any better alternative – by the looks of it, the Priv may end up leading this niche of the market. For anything else, you get an above-average phone that comes with the perk of a physical keyboard – if you’re the kind of person who prefers written communication over calling. The BlackBerry Priv doesn’t come in particularly cheap however – $844.99 at full retail price with no provider contracts.

Image Source: 1, 2, 3, 4, 5, 6, 7, 8, 9, 10, 11, 12, 13

Update 11/13/2015: The BlackBerry Priv uses a MicroUSB and not a Type-C USB Charger.

Filed Under: Headlines Tagged With: blackberry android, blackberry android phone, blackberry priv, blackberry priv review, blackberry smartphone

  • « Previous Page
  • 1
  • …
  • 9
  • 10
  • 11
  • 12
  • 13
  • …
  • 58
  • Next Page »

Subscribe to Blog via Email

Enter your email address to subscribe to this blog and receive notifications of new posts by email.

Join 11 other subscribers

Recent Articles

police handcuffs man

German Man Probed In Poisoning That Killed 21 Employees Since 2000

June 29, 2018 By Kenneth Scott Leave a Comment

Chicken wings bar

Intoxicated South Carolina Man Punches Waitress Who Refused to Serve Him Alcohol

June 29, 2018 By Karen Jackson Leave a Comment

gaming

New Zealand gamer Who Flew Halfway Across The World for Virginia Teen Gets Shots By Her Mother

June 28, 2018 By Cristopher Hall Leave a Comment

party

Former Virginia Tech Freshman Sentenced to 50 Years in Prison for Stabbing a Girl to Death

June 28, 2018 By Roxanne Briean Leave a Comment

bonfire

British Couple Sentenced to Life in Prison for Torturing and Murdering French Nanny

June 27, 2018 By Deborah Campbell Leave a Comment

pay phone

Texas Father of Girl Disappeared in the 80s Ignored by Authorities

June 26, 2018 By Cristopher Hall Leave a Comment

bottled water

San Francisco Woman Threatened to Call Police on Girl Who Sold Ice Water for Disneyland Trip

June 25, 2018 By Roxanne Briean Leave a Comment

Maplewood Park

Missouri Man Robbed by Date and Accomplice in Park

June 22, 2018 By Nancy Young Leave a Comment

coding

New York Man Sentenced in Cyberstalking Former Girlfriend, Mailing Drugs to Her Dorm

June 22, 2018 By Deborah Campbell Leave a Comment

headphones

Bose Poised to Launch Sleepbuds, In-Ear Headphones That Help You Sleep

June 21, 2018 By Nancy Young Leave a Comment

Police light

Intoxicated Female Driver in Custody for Pulling Arresting Officer by the Hair

June 21, 2018 By Kenneth Scott Leave a Comment

kitchen

Restaurant Manager Arrested and Charged in Shooting Death of Co-Worker over Negative Yelp Reviews

June 20, 2018 By Karen Jackson Leave a Comment

plastic container

Pennsylvania Couple Charged in Violent Death of Infant Discovered Buried in Cat Litter

June 19, 2018 By Cristopher Hall Leave a Comment

tailpipe

Minnesota Teen Gets Head Stuck In Oversized Tailpipe Winstock Music Festival

June 18, 2018 By Karen Jackson Leave a Comment

Pages

  • About Us
  • Contact us
  • Privacy Policy
  • Privacy Policy GDPR
  • Staff
  • Terms and Conditions

Recent Posts

  • German Man Probed In Poisoning That Killed 21 Employees Since 2000 June 29, 2018
  • Intoxicated South Carolina Man Punches Waitress Who Refused to Serve Him Alcohol June 29, 2018
  • New Zealand gamer Who Flew Halfway Across The World for Virginia Teen Gets Shots By Her Mother June 28, 2018
  • Former Virginia Tech Freshman Sentenced to 50 Years in Prison for Stabbing a Girl to Death June 28, 2018
  • British Couple Sentenced to Life in Prison for Torturing and Murdering French Nanny June 27, 2018
  • Texas Father of Girl Disappeared in the 80s Ignored by Authorities June 26, 2018
  • San Francisco Woman Threatened to Call Police on Girl Who Sold Ice Water for Disneyland Trip June 25, 2018

Categories

  • Business
  • Entertainment
  • Finance
  • Headlines
  • Health
  • Life
  • Nature
  • Science
  • Sports
  • Tech & Science
  • Travel
  • Uncategorized
  • United States
  • World

Copyright © 2026 ArgyllFreePress.com
About · Privacy Policy · Terms of Use · Contact